[adinserter block=”1″]
This guide will give you the easiest ways to rotate text in Photoshop.
I’ve been using Adobe Photoshop for many years and need to rotate text when creating graphics for clients.
Rotating text helps make your font look visually interesting and engaging. Plus, it’s a fantastic solution to space challenges.
Let’s dive into the tutorial.
HIGHLY RECOMMENDED

Download a free copy of Adobe Photoshop to follow along with this simple tutorial.
How to Rotate Text in Photoshop in 7 Steps
When creating graphics using text, you’ll sometimes want to rotate an entire paragraph, a sentence, or an individual letter.
We’ll show you how to rotate a body of text, a sentence, and an individual letter.
Plus, we’ll add a one-click option to flip text quickly.
Method 1. How to Rotate All the Text
To start, we’ll rotate an entire paragraph of font. This method can also be used when you want to rotate a word or sentence.
Step 1 – Open a Document
Head to the top menu bar in Photoshop and select File > Open.
The pop-up window to open your document will appear. Locate your document and click on it to open it.
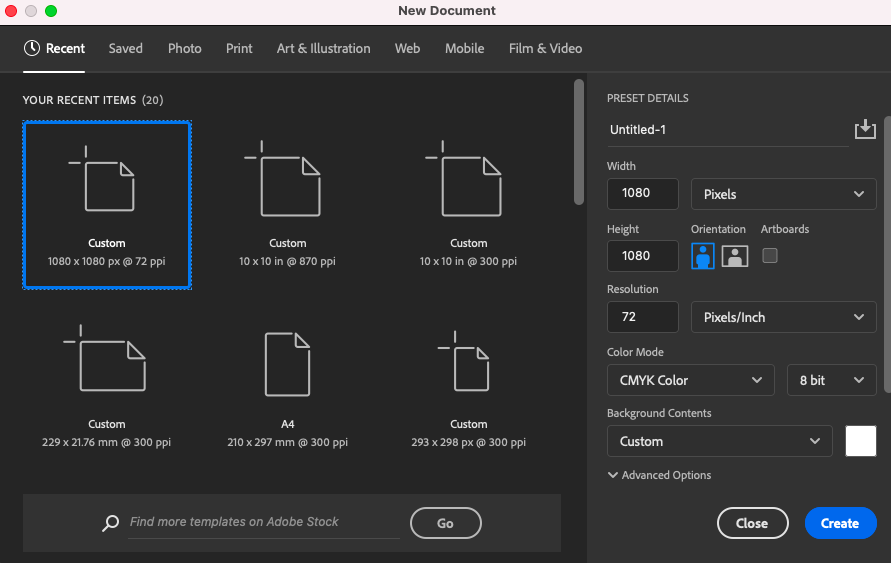
Alternatively, open a new document by going to the top menu bar and selecting File > New.
From the New Document dialogue window, select the custom document size that suits your design purposes or enter the document properties on the right-hand side under Preset Details.
Step 2 – Select the Type Tool
Select the Type tool from the toolbar, positioned under the Pen tool.
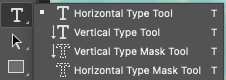
Or, for the keyboard shortcut, hit T.
There are four types of tools to choose from. For this tutorial, we are going to use the Horizontal Type tool.
Step 3 – Select Font Size, Color, and Style
When the Type tool is active, the tool’s options tab will open above the workspace.
Here, you can specify the properties of the text. The first option in the options tab is the font.
![]()
![]()
Select your preferred font style from the drop-down box.

If you want to use your own font, make sure you’ve uploaded it to Photoshop before you start the Photoshop session.
Enter your font size in the size value box, or click on the drop-down menu to select the measurement.

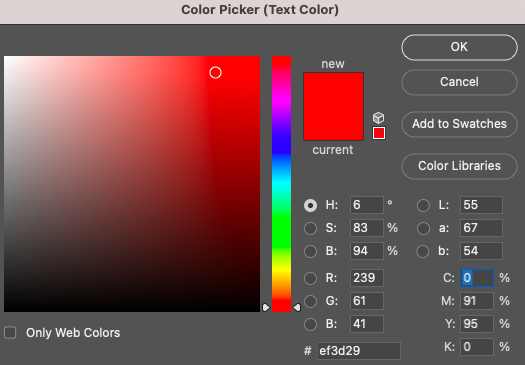
Click the color box on the right-hand side of the options bar to change the font color.
The Color Picker (Text Color) dialogue window will open. Enter the specifics for the color, or click in the box to select a font color.
And don’t worry; as long as the text remains as a text layer, you will be able to change the text properties during the editing process.
Step 4 – Create a Text Box
When using the Type tool, you have two options for creating text.
You can create a text box or type directly onto the document.
The text box will confine the placement of the text body within the box.
When you type on the document without the text box, you will have the freedom to type anywhere you wish.
To create the text box, click on the canvas workspace and drag your cursor across the canvas.
As you drag your cursor, the confining borders of the text box will appear, and a small black box with the box size measurements will appear in the bottom right-hand corner.

Release your cursor when you’ve reached the required size.
If you aren’t happy with the results, you can hover your cursor over the edges of the text box until an arrow appears. Now click down and drag the text box into its new position.
Step 5 – Enter Text
Now that you’ve set your font’s style, size, and color, it’s time to enter your text.
Photoshop allows you to copy and paste text from another document straight into Photoshop.
Locate the text you wish to rotate and copy it from your document.
Click on the canvas workspace, head to the top menu bar, and select Edit > Paste.
The text will appear in your canvas workspace.

Alternatively, you can add your text by typing directly into Photoshop.
Step 6 – Reposition
After you’ve entered the text, you may need to resize or edit it to fit the document perfectly.
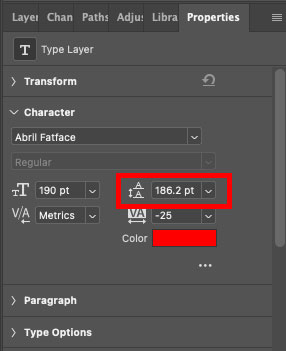
To space the lines between the font when they are overlapping, head to the Type tool’s Properties panel.
The Properties panel has seven options for editing your text:
Transform, Character, Paragraph, Type Options, East Asian Features, Middle Eastern Features and Quick Actions.

You can find the Properties panel by clicking the two arrows on the top right of your canvas workspace.
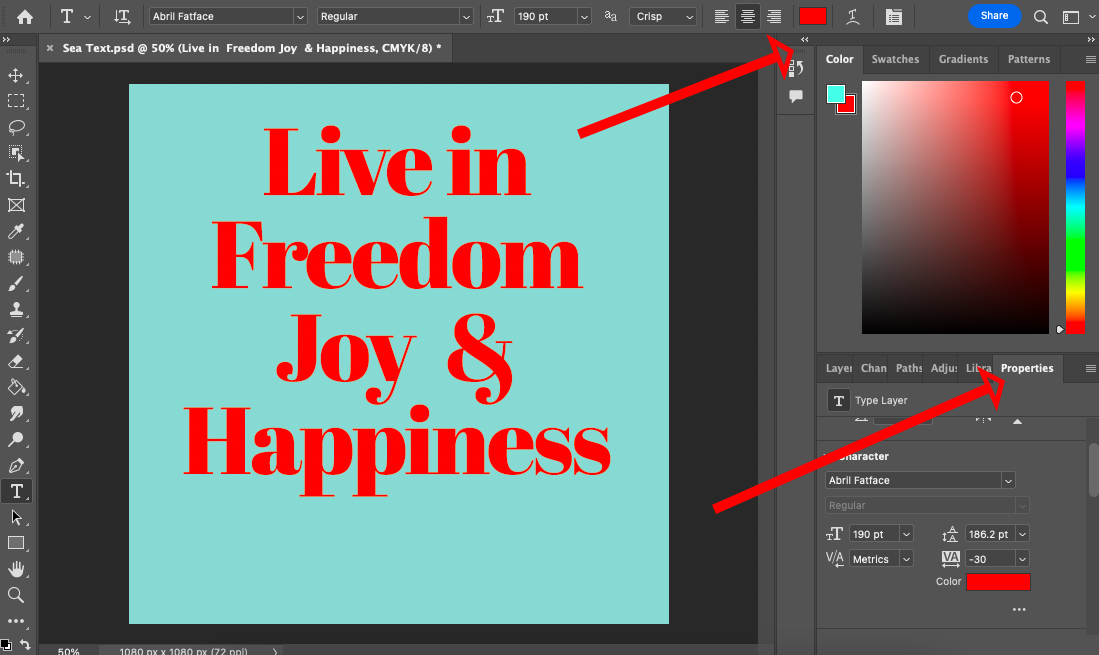
If you have problems locating it, head to Window in the top menu bar and click on Properties in the drop-down menu.
In the Properties panel, in the box under Character, enter a new value in the box beside the icon of two stacked A’s with an arrow beside them. This will change the spacing between your font lines.
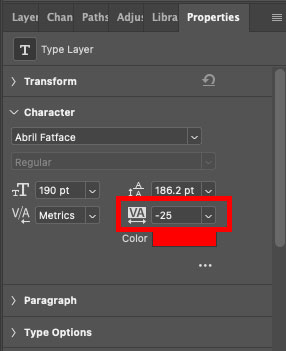
To alter the spacing between letters, enter a new value in the box beside the rectangle icon containing VA, with an arrow underneath.
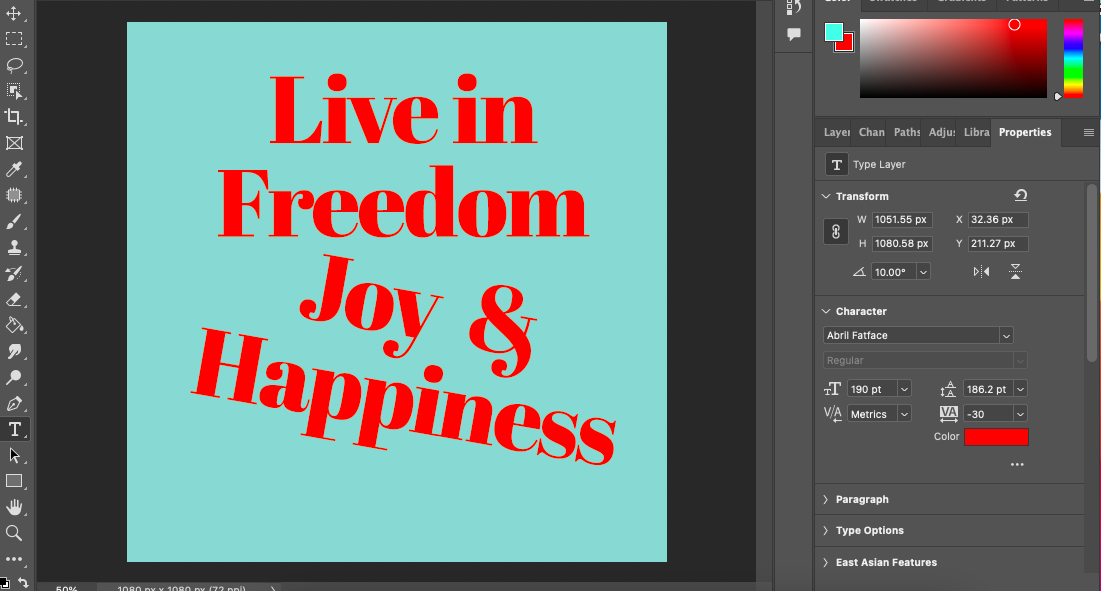
Step 7 – Rotate Text
Now that you have the text perfectly in place, you can begin to rotate it.
Head to the section named Transform in the Properties panel. Click on the arrow beside Transform to open the editing options.
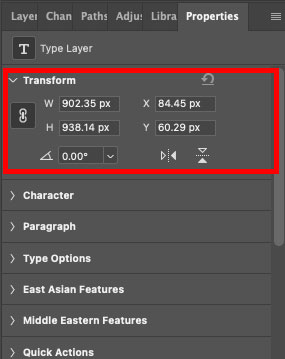
The first two value boxes on the left-hand side indicate the size of the font, its width, and height.
The second two value boxes indicate the positioning of the font in the canvas workspace.
The angle icon below indicates the degree of the text’s rotation in the canvas.
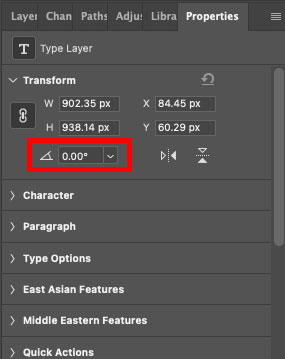
This is where we can rotate the text body.
You can enter a new value in the box to rotate your text body.
Alternatively, click the arrow beside the value box, and Photoshop will present you with a set of degree measurements.
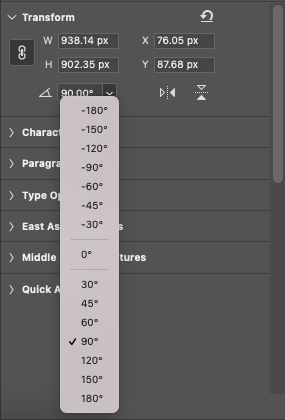
Select your degree of rotation by clicking on one of the degrees.
Once clicked, the text will be rotated in the canvas workspace.
In the image below, the text has been rotated by a degree of 30.

Increase the value of the degree to increase the angle of rotation.
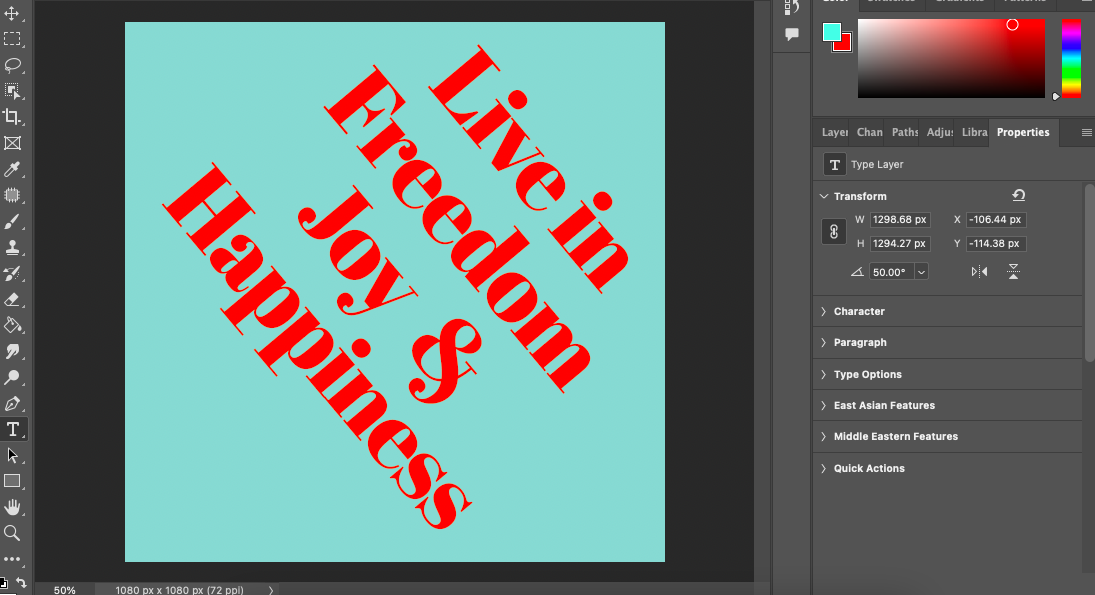
The degree was increased to 50 degrees in the following image. As you can see, its rotation is greater than the angle of 30 degrees.

Select a negative degree if you wish to rotate the text body to the right-hand side.
In the following image, -30 degrees was entered, and the text was now rotated to the right.

Now you know the secret to rotating text in Photoshop.
While we’re here in the Type tool’s Properties panel, let’s also check out how to flip text.
Step 8 – How to Flip Text
To flip text in Photoshop, you can use the Type tool’s Properties panel.
To the right of the rotate text value box, you’ll find the two icons you can use to flip text; both are arrows.
The first icon is two horizontal-pointing arrows, and the second is two vertical-pointing arrows.

Ensure the text you wish to flip is active in the Layers panel, then click on the first arrow icon.
Once clicked, the body of text in your canvas workspace will be flipped horizontally, as you can see in the image below.
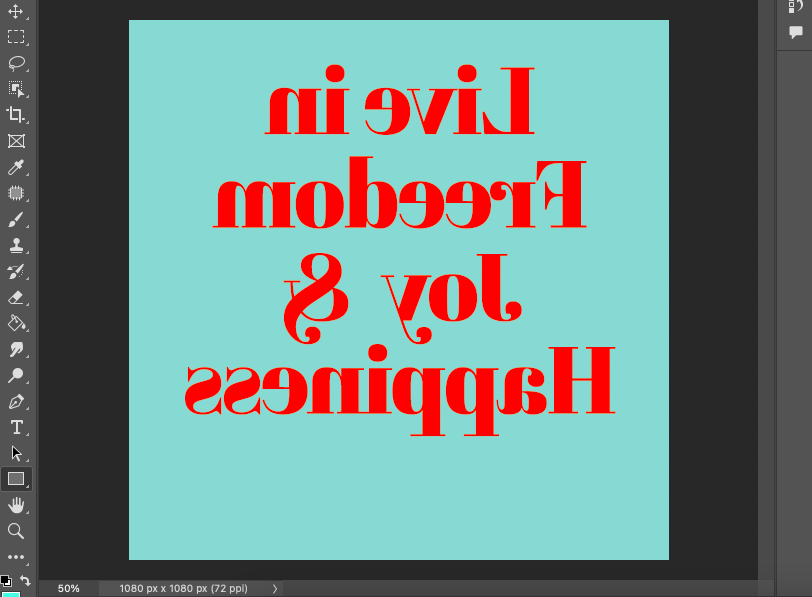
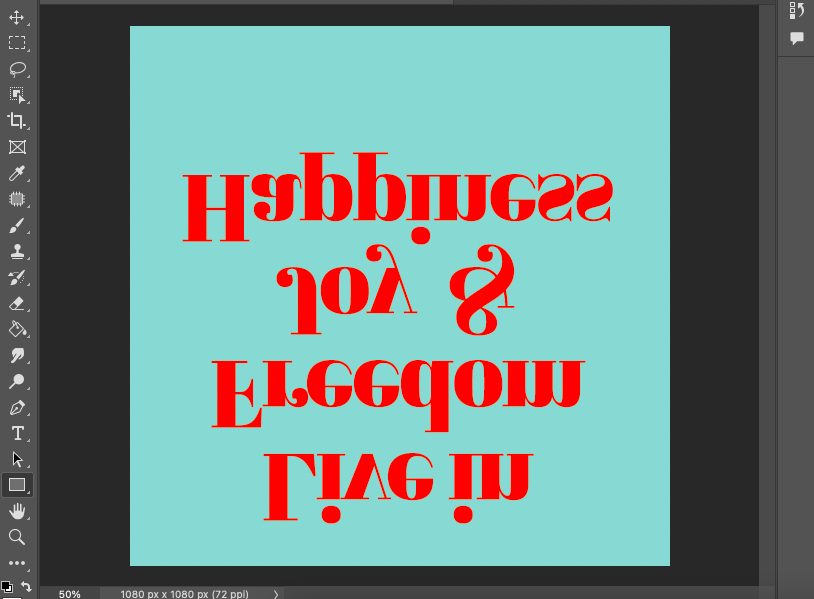
Click on the second arrow icon to flip the text body vertically, as shown in the image below.
Notice that the text is flipped not only vertically but it has also been repositioned to the very bottom of the text box.

If at any time you want to clear the edits you made, click on the bent arrow at the top of the Transform box.
Once clicked, all the edits you created in the Transform box will be cleared.
Method 2 – Rotate Text Using the Transform Tool
The Type tool’s Properties panel is a great way to rotate text, but there is another way to rotate text that is worth knowing about.
The Transform tool is sometimes a better option for rotating text than the Type tool because you can rotate the text from various positions.
In other words, you are not restricted to rotating the text from the bottom side.
Let me show you how.
Step 1 – Select the Transform Tool
Once you have the text ready as a layer in the layers panel, open the Transform tool.
Head to the top menu bar and select Edit > Transform.
From the drop-down menu, select Rotate.

Step 2 – Transform Tool’s Option Tab
When the Transform tool is activated, its options bar will open above your canvas.
The first icon is a square comprised of eight transparent squares and one white square. This is where you can set the location from which the text will rotate.

Make sure the box beside this icon is ticked.
The transparent square in the icon indicates which point of the transform box will be locked and where the text will pivot from.
To change the anchor point’s location, click on one of the squares within the square icon.
Once clicked, the square will turn transparent and indicate where the text will rotate from.
In the image below, the middle bottom square has been clicked in the icon, and the middle bottom anchor point of the transform box has been locked.
The rotation will pivot at a 360-degree angle around this point.
To rotate the text around the pivot point, hover your cursor on the Transform bounding box until a bent arrow appears.
When the arrow appears, click on your canvas and drag the box into position.
Release your cursor when you have reached the desired position.
Another option to rotate the text is to enter a value in the options tab beside the angle icon.

This will automatically rotate your text.
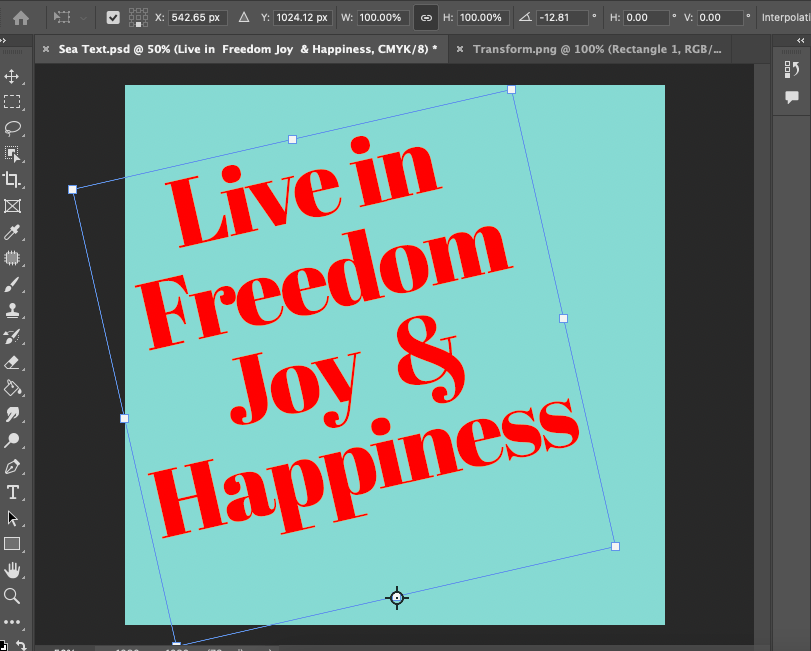
In the image below, the top middle anchor point has been activated, and a degree of 8.21 has been entered into the angle value box.

In the image below, the bottom right-hand corner has been activated, and the text box has been dragged to an angle of 15.40 degrees.
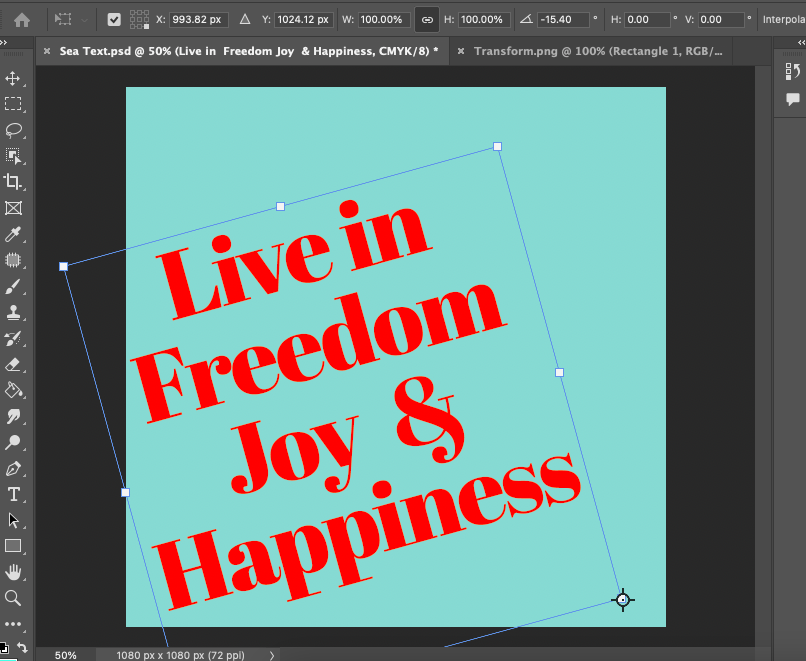
As you can see, the Transform tool option allows for alternative rotations compared to the Type tool.
Step 3 – Flip Text
Using the Transform tool, it is possible to flip the text body.
To do this, head to the top menu and select Edit > Transform.
From the drop-down menu that appears, select Flip Horizontal if you want to flip the text horizontally.

If you want to flip the text vertically, select Flip Vertical.
Once an option has been selected, the text will immediately be flipped in the canvas workspace.
While there is a simple option to flip or rotate text in Photoshop, it’s not easy to select part of the text body to rotate individually.
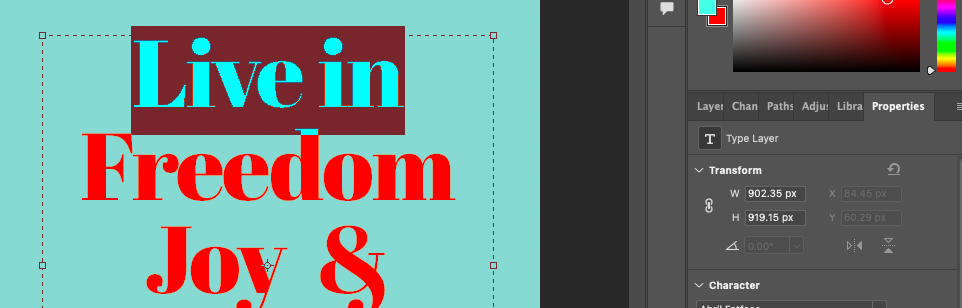
When using Photoshop, you can highlight a section of text in the text layer and change the text’s style, color, and size independently of the rest of the text body,
However, Photoshop will not allow you to flip or rotate the selected text separately from the rest of the body.
As you can see in the image below, the text “Live in” is selected, and the option to rotate or flip has been deactivated in the Properties panel.

How to Rotate a Letter or Sentence Separately
If you wish to rotate a line of text separately, a solution is to create an individual layer for the text.
This will also work when you wish to rotate an individual letter.
Step 1 – Activate Type Tool
To rotate a sentence separately, we can use either of the two methods above, but first, we have to separate the sentence from the paragraph.
Select the Type tool from the toolbar or hit T for the keyboard shortcut.
Step 2 – Select and Cut the Sentence or Letter
Using the Type tool, highlight the sentence you wish to rotate from the text body.
Head to the top menu and select Edit > Cut.
The sentence will now be cut from the paragraph.
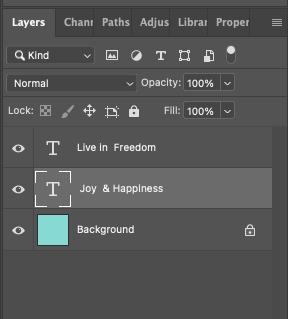
Step 3 – Create a Layer for the Sentence or Letter
Click on the canvas and drag across to create a new text box. Now, head to the top menu bar and select Edit > Paste.
The sentence will now have a separate text box, and a new text layer will be created in the Layers panel.
Step 4 – Rotate the Text
Now access the Properties panel and click the downward arrow beside Transform to open the Text tool’s Transform options.

Add a value for the rotation you wish to achieve in the box beside the angle icon.

The sentence will automatically be rotated. If you wish to reposition the sentence, select the Move tool from the toolbar and drag the sentence to the preferred position.
You can follow the same method to rotate an individual letter.

I hope you enjoyed this tutorial and that it helps you with your future designs.
And, as always, have fun editing.
If you liked this tutorial, you might also enjoy How to Wrap Text in Photoshop (3 Different Ways).
FAQ
How do I change text from vertical to horizontal in Photoshop?
To change the text from horizontal to vertical in Photoshop, select the text you wish to change.
Then, in the top menu bar, select Edit > Cut. Head to the toolbar and select the Vertical Type tool.
Click on the canvas to create a new text line and select Edit > Paste. Your text will now be vertically positioned.
To change text from vertical to horizontal?
To change the text from vertical to horizontal in Photoshop, select the text in the canvas.
In the top menu bar, select Edit > Cut. Now, select the Vertical Type tool from the toolbar.
Click on the canvas and select Edit > Paste. Your text will now be horizontal.
How do you twirl text in Photoshop?
To twirl text in Photoshop, head to the top menu bar and select Filter > Distort. From the drop-down menu, choose Twirl.
A dialogue window will appear. To twirl the text, you must first convert the text layer to a smart object. Select Convert To Smart Object, and click OK.
In the Twirl panel that opens, slide the slider to the left or right to change the intensity of the twirl.
Click OK to finish.
How can I rotate text in Photoshop?
To rotate text in Photoshop, activate the text in the canvas workspace and select Layer in the top menu bar.
From the drop-down menu, select Transform > Rotate.
The Transform Rotate tool’s options bar will open above your workspace. Here, you can enter the properties of the rotation you wish to create.
[adinserter block=”1″]
Credit : Source Post