
[adinserter block=”1″]
This guide will give you the easiest ways to change color to black and white in Photoshop Cs6.
I’ve been using Adobe Photoshop for many years and regularly change colored images to black and white.
Using the Photoshop Adjustment layers helps you to alter the color of photos.
Let’s dive into the tutorial.
HIGHLY RECOMMENDED
Download a free copy of Adobe Photoshop to follow along with this simple tutorial.
How to Change Color to Black and White Cs6 in Photoshop
I first learned photography using black and white film, and it was, for many years, my preference. They have a dramatic visual effect that I still believe can’t be matched by color.
Their grey tones and stark contrast make black and white photos striking. They create a moody, elegant, and often mysterious atmosphere.
It took me years before I appreciated what color photography had to offer—preferring to shoot color only when I could choreograph the exact combination of colors.
More often than not, I will turn my color photographs into a black and white version.
Doing this can draw out unexpected results; the textures are richer, and the subject is more defined.
Changing a color photo to black and white can be a simple click of the cursor.
But don’t be fooled into thinking that’s all there is to black-and-white photography.
To truly really reap the rewards of the monochrome world, it’s worth investing time in fine-tuning the results.
Reasons to Change a Photo to Black and White
Changing an image to black and white can help draw attention to the main subject.
Color in photography can be confusing. Particularly if there is an assortment of mismatched or clashing colors, creating a confusing visual.
Color attracts your attention; it’s bright, it’s bold, it’s brazen, but it is also distracting.
Removing color allows the viewer to focus on the light, the texture, and the tones.
If you wish to focus on the texture of tree bark, the bark color can steal the limelight.
The same is true when you wish to highlight a design, such as wallpaper. The wallpaper’s color can steal the show. The viewer might not even notice the design.
Many photographers shoot in black and white to gain a deeper understanding of light, texture, and composition.
Changing color images to black and white can help unravel some of the mysteries of tone and light.
There are three different options to change an image to black and white using Photoshop Cs6.
Change to Black and White using Adjustments – Desaturate
This is a quick-click solution to remove color from an image.
But be aware that converting an image to black and white using modes will remove all the image’s color information.
Step 1 – Open the Image in Photoshop
Head to the main menu bar and select File > Open.
Locate your image and double-click its thumbnail to open it or highlight it and hit the Open.
Alternatively, drag the image thumbnail from the desktop into Photoshop Canvas to open it.
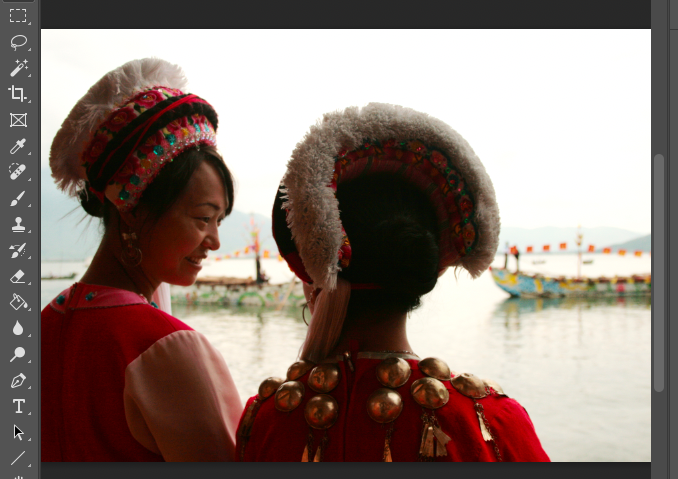
For this tutorial, we will use this image of two Chinese women. Their bright red tribal clothing dominates the composition.
Step 2 – Convert to Black and White
Head to the top menu bar above the canvas workspace and select Image.
From the drop-down menu that appears, select Adjustment > Desaturate.

Once you have clicked Desaturate, your image will be automatically converted to black and white.
As you can see below, the Chinese women’s red dresses no longer command attention.
The tones and shading of the scene are more obvious, and the woman’s smile is no longer lost.

Step 3 – Save the Image
To save your image, head to the main menu bar and hit File > Save as.
The Save as dialogue window will open. Enter a name for the image and select the location you would like to save it to.
Then hit Save.
Using the desaturate method, your image will automatically be desaturate.
Automatic is great for fast edits. However, it’s not ideal if you wish to have control over the edit.
If you wish to fine-tune and alter the contrast of the black-and-white transformation.
Use the following method.
Convert to Black and White Adjustment – Black & White
Step 1 – Open your Image
To open your image, use step one in the first method.
For this method, we are using an image of Chinese women parading in their blue costumes.

Step 2 – Convert to Black and White
From the top menu bar, select Image > Adjustments.
From the Adjustments drop-down menu, select Black & White.

Once selected, the Black and White dialogue window will open.
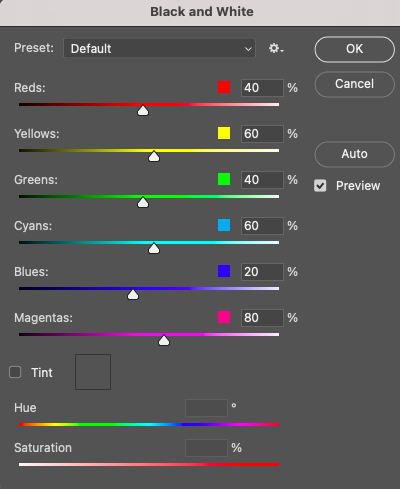
The first option in the Black and White dialogue window is Presets.
Click in the box beside Preset to open the selection of Black and White presets.
Each preset will create distinctly different visual effects. A preset might make one image look bland, while another pop with contrast.

Test and experiment with how different presets look on your image.
Before you start, tick the box beside Preview. When this is clicked, a preview of each preset will be displayed in the canvas workspace.
Here below are a couple of examples of the differences between presets.
The first used is Blue Filter, which targets the blue hues in the original image.

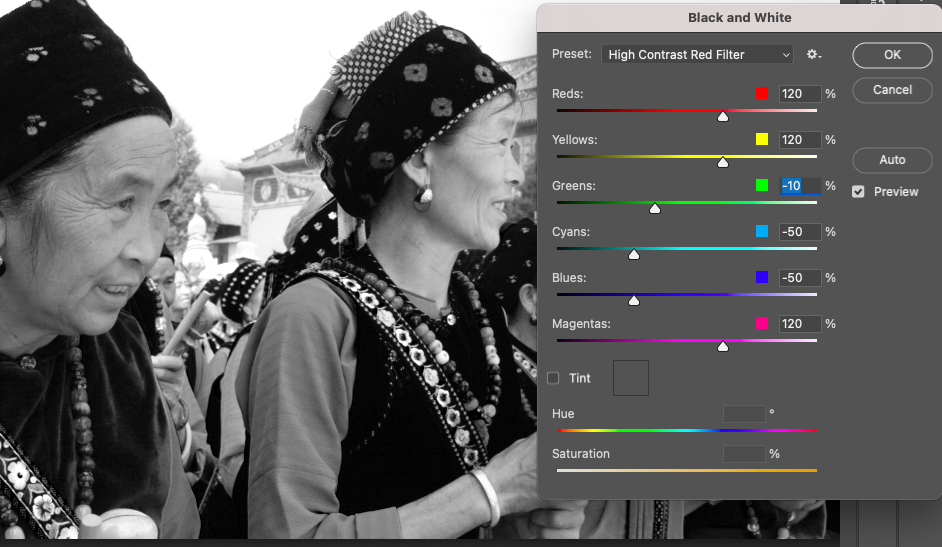
The second example below is the High Contrast Red Filter, which targets the red hues.
As you can see, each preset generates unique results with varying contrast and tones.
As each preset is applied, the hue sliders will jump to a new position.
You can adjust the sliders if you like.
Below the Preset box are the hue sliders. There is a slider for each hue, Reds, Yellows, Greens, Cyans, Blues and Magentas.
To alter the contrast of the image using the sliders, first, select Custom from the Preset choices.
Slide a hue slider to the right to increase the lightness. Slide the slider to the left to decrease the hue’s lightness.
Alternatively, change the value in the hues percentage box from -200% for darkest to 300% for brightest.
Zoom in on the image if there are areas of texture or detail that you wish to prioritize.
In the image below, we have zoomed into the woman’s face. We want to focus on the detail of her wrinkles and the texture of her outfit.

At the bottom of the Black and White panel is the option to tint the image.
To tint the image, tick the box beside Tint.

Select the hue for the tint by sliding the Hue slider until you reach the desired hue.
Adjust the saturation of the hue using the Saturation slider.
Using the Tint option, you can create interesting hue overlays for your black-and-white images.
Step 3 – Save the Image
Save the image to your desktop by heading to the top menu bar and clicking File > Save as.
Change to Black and White using Image Mode
Changing an image’s mode is another way to convert a color image to black and white.
An image’s mode determines the image’s colors and how these colors interact.
Converting an image from RGB or CMYK to grayscale will remove color from the image.
But be aware converting an image to black and white using modes will permentaly delete color data.
Step 1 – Open the Image in Photoshop
Open the image as explained in Step One above.
As you can see, the photo below has opened in RGB mode and has a Red, Green, and Blue Channel.

Step 2 – Change Mode
Head to the top menu bar above the canvas workspace and select Image.
From the drop-down menu that appears, select Mode > Grayscale.

When Grayscale is clicked, a pop-up window will appear with a warning.
When an image is converted to Grayscale, all the color information will be irreversibly trashed.
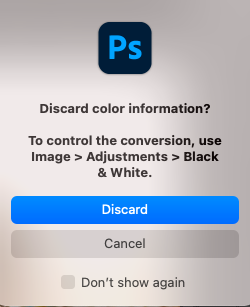
To proceed, click Discard.
When Discard is clicked, the image will be changed to grayscale and thus converted to black and white.
As you can see in the example below, now there is only one channel in the Channels panel, a gray channel.

Changing an image to grayscale is automatic, but you can alter the contrast by using Levels.
Step 3 – Fine Tune the Results
We use Levels to adjust the light and dark areas of a black-and-white photo.
Some photos are more impressive when they are highly contrasted. Others are more interesting when gray tones are brought forward.
Activate the Levels tool by clicking Image > Adjustment > Levels.
The Levels dialogue window will open.
Tick the box beside Preview to generate a preview of your edits in the canvas workspace.

You can select a Levels preset from the Preset drop-down box.
The Preset choices range from Darker, Increase Contrast, Lighten Shadows to Midtones Bighter.

Select a preset and click OK to apply it.
Alternatively, adjust the three toggles under the Input Levels graph and the two toggles under the Output Levels.
To do this, click and drag the toggles into a new position.
Step 4 – Save the Image
When you have completed the Level adjustment, you can save your image.
Head to File > Save as, and save your black and white master piece.
Change to Black and White using Hue/ Saturation
Another way to desaturate an image and remove all colors is by using the Hue/Saturation Adjustment.
Step 1 – Open the Image
Follow the first step steps in the first method.
Step 2 – Open Hue/ Saturation
Head to the main menu and click Image > Adjustments.
From the drop-down menu that opens, select Hue/ Saturation.
Or, for the keyboard shortcut, hit the U key.
The Hue/ Saturation dialogue box will open.

To desaturate the image, slide the Saturation slider to the far left, or change the value in the Saturation box to -100.
Then click OK.
Change to Black and White using Adjustment Layers
For those of you using Photoshop CC, it is worth knowing you can add a Black and White Adjustment Layer to an image.
Photo editors and designers alike love Adjustment layers because they are indestructible.
This means they are edits that can be altered or removed without affecting the original image or other edits.
Step 1 – Open Adjustment Layers

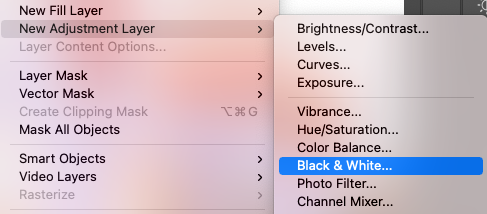
When your image is open, head to the main menu and select Layer > Adjustment Layer.
From the drop-down menu, select Black & White.
Alternately, head to the Adjustment panel and select Black & White.
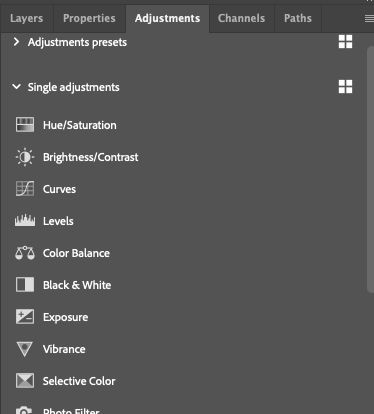
The Adjustment panel is usually located beside the Layers and Channels Panels.
If you can’t find the Adjustment panel head to Window > Adjustment, click it to activate it.
Step 2 – Fine Tune the Contrast
Once Black & White is selected image will be converted to black and white.
You can change the setting of the Hue sliders to adjust and fine-tune the contrast of the black-and-white image.
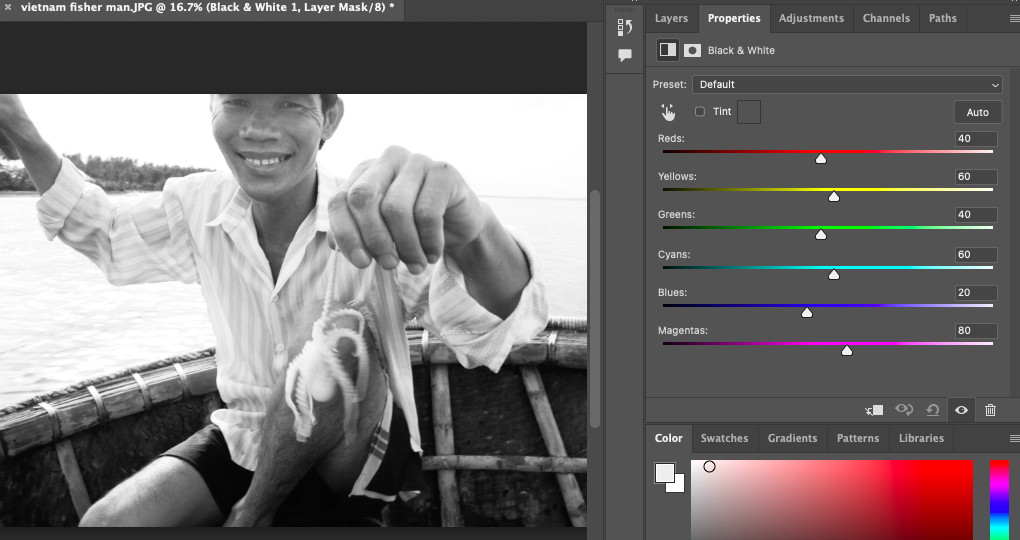
In the Layers panel, a new Adjustment Layer will be added.

Click on the Black and White Adjustment layer at any time in the editing process to adjust its settings.
Now, you have a few new editing tricks at your disposal.
I would suggest you take a few of your favorite color photos and convert them to black and white.
It is more than likely that you become hooked on the beauty of the monochrome world.
If you enjoyed this Photoshop tutorial, you are more than likely going to enjoy – How to select by color in Photoshop (4 ways.)
FAQ
How do you convert to black and white in Photoshop?
To convert an image to black and white in Photoshop, head to the top menu bar and select Image.
A drop-down menu will appear; from here, select Adjustments > Black & White.
Your image will be converted to black and white.
How do I change a color to black and white in Photoshop?
To change a single color to black and white in Photoshop, you will first need to isolate the color by creating a selection
You can do this by heading to the main menu and selecting
What is the shortcut key for black and white in Photoshop CS6?
For the shortcut for a black-and-white image conversion in Photoshop Cs6 hold Shift and Command then hit U (for Macs) or hold Shift and Ctrl then hit U (for Windows.)
How do I color a black-and-white photo in Photoshop?
To color a black-and-white photo in Photoshop, use Layer Masks.
Create Layer Masks for each color you wish to add. Hide areas you do not wish to color and reveal areas you wish to color.
Select the Brush tool, choose a color, and set its opacity to 70%. Now, paint the photo.
[adinserter block=”1″]
Credit : Source Post